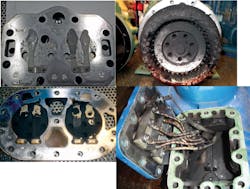
With the cooling season in full swing, a service technician must be prepared and in the right mindset to diagnose a whole variety of issues related to comfort cooling.
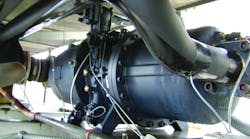
For the most part they’re relatively easy repairs, such as cleaning coils, finding refrigerant leaks or replacing bad electrical components. With that said, the one issue that causes the whole system to come to a screeching halt is the compressor. The heart of the system has only one function: to keep refrigerant moving. Replacing a compressor is pretty straightforward if you take the time to follow some simple guidelines.
1. Collect Key Information
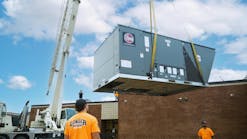
Gather as much information as you can, such as model number, serial number, phase, voltage, amp rating, refrigerant type and type of failure (is it a burnout or mechanical failure?). Also, look to see how you will get the compressor into the unit. Will you need a crane or rigging?
One last piece of information is, what shape is the contactor in? Some compressor manufacturers won’t warranty a compressor if the contactor has not been replaced.
2. Verify the New Compressor
Check the model number, serial number and voltage of the new compressor before you take it out of the box. Also check it for a short to ground with a meter. It doesn’t happen too often that you get an electrically bad compressor from the factory, but it has happened.
Some compressor manufacturers won’t warranty a
compressor if the contactor has not been replaced.
3. Make a Visual Guide
Mark all the wires or draw a diagram of where they all go on the compressor.
4. Test the Oil
Whether the problem is a burnout or a mechanical failure, you need to take an oil sample and test it for acid with a field test kit. If acid or contaminants are present, then proper clean-up procedures must followed.
5. Clean up Properly
Oversize the liquid line filter drier and add a replaceable suction line filter drier. Change the oil after the compressor has run for a period of time under a good load. Retest the oil. There are no shortcuts in this procedure. Oil additives from a variety of companies will assist the clean-up process but are not meant to replace proper clean-up procedures.
6. Test the system
Once the compressor has been replaced, take an initial mega ohm reading before start-up. This will give you a baseline to compare to. If the reading goes down after the compressor has had some run time, then an oil and drier change is needed. Clean-up is complete once a reading that is consistently close to baseline is established.
7. Log the Start-up
Take your readings and fill out some sort of field start-up log. Include suction and discharge pressures, super heat temperature, sub-cooling temperature, crankcase temperature, voltage, amps, mega ohm, inlet and outlet temp of the media being cooled, sight glass color and date and time of the last oil change. This log will give the next technician a snapshot of how the system was operating when the new compressor was installed.
When compressors fail, it’s usually not from old age. System problems are the most likely cause. Never rule anything out until it has been tested and verified. Too many compressors get replaced only to fail again. Finding the reason why is the real skill to replacing a compressor.
Paul Perkins is service manager for Owens Companies, a leading commercial mechanical contractor based in Bloomington, MN, and the 1996 Contracting Business Commercial Contractor of the Year.
Other Retrofit Compressor Conversion Tips
Occasionally, a failed compressor is no longer available, or the technician decides to upgrade to a different model, brand, or compressor type. This is referred to as a retrofit conversion, and could include the following possibilities:
• Brand X to Brand Y (of the same compressor type)
• Large reciprocating(s) to a screw compressor
• Scroll to a reciprocating
• Reciprocating to a scroll.
In some cases, an R22 system is being converted to an R407C or even an R-134a system. While it’s easy to determine the matching BTU requirement in a retrofit conversion application, there are other considerations. For instance, if changing from R-22 and a mineral or AB oil based compressor, to R-407C or R-134a, then POE oil will be required in the new compressor. The technician will also need to confirm if the geometry of the replacement compressor is “equivalent,” to ensure that the retrofit compressor will fit into the system.
Changes to the mounting base and piping layouts must be considered in a retrofit conversion.
Another consideration is the controller that operates the compressor unloading. Unloading on a reciprocating compressor is different from unloading on a screw compressor, though they serve the same purpose. It’s not unusual to change the controller in a retrofit conversion.
The retrofitting process as it relates to system components is unchanged. Regarding screw compressors, however, it’s highly recommended that the technician do a complete oil change after several days of operation, to ensure that the oil quality is perfect.
In today’s economy, building owners and facility managers may not have a budget that allows for upgrading an entire system. In these situations, many are opting for new compressors that are much more efficient than those on 10- to15-year-old systems.
In many cases, there are utility rebates available to those who upgrade their air conditioning and refrigeration systems.
The retrofit tips outlined here are valuable for virtually any retrofit application. — David Sylves, vice president, sales and marketing, BITZER.


