Duct leakage associated with forced air HVAC systems has proven to be one of the largest energy wasters in our industry. Just like many things in the HVAC business, the devil is in the details in regards to duct sealing. Depending on who you talk to, you could get a number of different answers on the proper way to seal a duct system. There are a lot of different tools, materials, methods, and testing that contractors are using to seal ducts.
What gear do I really need to seal ducts?
The type of sealant you plan on using for patching all those holes is going to have a large impact on the gear you will need.For UL 181 rated tapes, you're going to need some good rags for cleaning the duct material off, and a squeegee for smoothing out those taped joints.
If applying a water based mastic to a duct system, you're going to need an old set of clothes or coveralls, a set of gloves (I like Kevlar) and a hat to get started. Eye protection, different width paint brushes ranging from 1-in. to 3-in., drop cloths, masking tape and 10-10 mesh tape are also handy items to have on the truck. For sealing those penetrations that are created by boots coming through the subfloor, ceiling or wall you will need a good caulking gun for applying caulk, silicone or mastic in a tube.
All those sealants
UL 181 is the standard by which all duct sealants are rated. The main parts of UL 181 that apply to field fabricated ducts include UL 181A and UL 181B. One sealant that has been used by the HVAC industry for years is the one that has proven to be the most unreliable; I'm talking of course about duct tape.
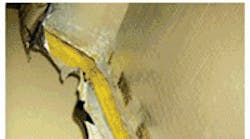
How many times have you gone in on an older system and noticed that the duct tape that was used is falling off the duct in shreds? Turns out that duct tape starts to delaminate pretty quickly once applied and loses any sealing potential within less than a month. Foil tape or "plenum on a roll" as we call it is also really popular but often fails to really do the job in many cases also due to delaminating and improper installation on oily, dirty ducts. The oily, dirty ducts will even plague a tape with a UL 181 rating; this is the biggest downfall of using tape as a sealant. Mastic seems to be the sealant of choice by most, even though installers seem to hate it due to the mess associated with it.
Mastic can easily be applied to all of the joints of a duct system using a brush with the only limitation being the ability to reach a joint. Depending on the size of the gap in the duct joint you might need that mesh tape I mentioned earlier. If you apply a bed of mastic on the larger gaps and apply the mesh tape with a coat of mastic over it you can seal some pretty good size gaps. For boot penetrations it will be time to move on to a caulk gun and mastic in a tube. If the drywallers went wild with the hole saw you might have to pull out the mesh tape or some metal angles to help seal those larger gaps.
So where do I put this stuff?
Installation crews do a great job with the fabrication and installation of a duct system but many times don't fully understand the importance of a properly sealed duct system. It seems many installers just paint the ducts in an effort to please code officials instead of realizing how beneficial properly sealed ducts are. We often times see ducts with only three sides sealed and mastic applied to the wrap instead of to the duct itself just to appease code requirements.
As a general rule all ducts leak, some worse than others. The trick is to know where the different leaks are located and deal with them before they're an issue. Sealing a new duct system is much easier than trying to deal with it after the drywall and insulation are installed. Any mechanical joint in a duct system has the potential to leak. The drive and S-cleat joints tend to be the big focus but what about the collars and top take-offs? When you get down to analyzing all the places air can leak out of a duct system it can be mind blowing so let's look at a few places that are the most common repeat offenders.
Trunk and Branch Ducts
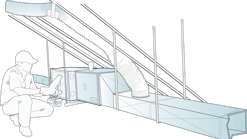
Picture a gas furnace or air handler and the attached duct system in your mind.Starting at the supply side duct connection of the equipment we have a plenum attached to the equipment with the potential for leaks. You have the duct connections to the plenum in addition to where the plenum attaches to the equipment. If it's not a solid piece of metal you have a potential leak.
Now let's continue to walk the supply trunk. If you were a betting person it would be a good wager to place your money on a duct leak at every four-foot interval with quite a few leaks in between that distance.
Typically where your trunk connections are made you will find a nice gap at the drive and S cleat connections on all four sides. The snap lock edges and branch takeoffs in each four foot section are also going to have to be sealed as it's not a solid piece of metal. Looking at the branch runs you’re going to have a leakage point at every joint and seam more so if using pipe versus flex. The boot is the next leakage point to address.
There are a lot of joints in this fabricated fitting as it goes into the building enclosure. The return side of the duct system gets really fun, especially if you're using panned returns. The leakiest connections we find are where the return duct and floor joist intersect, with the top of the duct being cut out as a return pathway. This is a hard place to seal as it’s not the easiest place to access. 2-in. X 2-in. metal angles seem to work great here and should be installed by applying a bed of mastic then mechanically fastening these angles down. After they're screwed down apply another layer of mastic for good measure. The end caps used in the floor joist are also a large leakage point as wood will always expand and contract due to variations in moisture content. This continual movement is too much for mastic and it will crack it over a period of time. If the end caps are in I-joist your possibility of leakage jumps about tenfold due to the overlapping of joist with multiple 2-in. X 10-in. openings left unnoticed.
The amount of cross leakage and leakage directly to the attic when wall cavities are used can be huge depending on how true the studs in the wall are. This is one of the reasons we recommend abandoning building cavities as return ducts where you can.
HVAC Equipment Leakage
The air handling equipment presents a real challenge for duct sealing as you have to allow for future access to the equipment if something should go wrong.
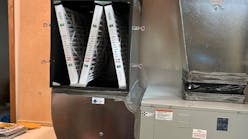
This is where good gasketing material and strategically placed silicone work well together. Most cabinets leak a lot more than your typical hole due to the closeness to the blower. Base pans, electrical knockouts, refrigerant and drain line openings, and blower panels all top the list for top leakage points to address. The filter rack is another place that is often ignored as it is left wide open so the filter is easy to get to. The whole time this is occurring a lot of unfiltered and possibly unconditioned air is being pulled directly into the blower bypassing the filter. Packaged water source heat pumps present a unique obstacle as the blower section sits directly on top of the compressor and control section. There are usually a lot of unintentional connections between the two areas, with dust on the lower panel being a telltale sign that this is occurring. Once again, strategically placed silicone and gasketing can help to minimize this connection between the two compartments.
All aspects of the duct design process need to be given attention and verified before any proper sealing job can be considered worthwhile.
To focus on only one variable as being more important than any of the others, is making a lot of assumptions. When proper duct sealing is combined with proper design and insulation, and airflow delivery that's been tested and verified, you have an HVAC system that will provide total comfort.
This file type includes high resolution graphics and schematics when applicable.
David Richardson, a performance-based HVAC contractor, is the president of Thermal Performance Services, and owns a building performance consulting company located in central Kentucky. He can be reached at (502)-803-1949 or by e-mail at [email protected].


