EDITOR'S NOTE: Material for this article was taken with permission from the Sheet Metal and Air Conditioning Contractors' National Association's (SMACNA's) 1995 HVAC Duct Construction Standards (metal and flexible). For information about the association, or its standards, contact SMACNA at 4201 Lafayette Center Dr., Chantilly, VA 20151-1209, or call 703/803-2980.
We've all heard the stories, and many of you have no doubt seen the installations where the flex duct sags several feet between hangers, or it's nearly or completely flattened out in spots, or the connections have all come apart, or worse yet were never made at all in some places.
Well, the Sheet Metal and Air Conditioning Contractors National Association (SMACNA) was aware of those problems, so they wrote a standard to help people avoid them. You can use the following excerpts from that standard to help make sure the flexible duct systems you install provide the maximum performance for your customers.
To begin, there are four types of flexible duct: metallic, uninsulated; metallic, insulated; nonmetalic, uninsulated; and nonmetalic, insulated (lined). As with any product you install, safety is an important consideration. So, when these ducts must conform to National Fire Protection Association (NFPA) Standards 90A or 90B, they must have been tested in accordance with Underwriter's Laboratory's (UL) Standard for Factory Made Duct Materials, UL-181, and be installed the way their UL listing requires.
Separate installation limitations for flexible connectors and flexible ducts are identified in NFPA Standard 90A. UL Standard 181 defines a flexible connector as a flexible air duct that hasn't had certain flame penetration, puncture, and impact tests.
Installation Precautions
You should always opt for the minimum length of flexible duct. Any necessary bends should be made with not less than one duct diameter centerline radius. When you do bend the duct, it should extend a few inches beyond the end of a sheet metal connection before you bend it. When you're bending the duct, be careful not to compress it.
You should locate flexible duct -- especially the nonmetalic, and wrapped metallic flexible duct -- away from hot equipment such as furnaces and steam pipes.
Joining Requirements
When you're joining lengths of flexible duct or attaching duct to air supply or terminal equipment, make sure the adhesive is chemically compatible with the materials you're using.
Trim the end of the ducts so they're square before you begin installing them. Collars that you're attaching the duct to need to be a minimum of 2 in. long; therefore, the sleeves used for joining two sections of duct should be at least 4 in.
Collars and sleeves need to be inserted at least an inch into the duct before you fasten them.
SMACNA advises using at least three #8 sheet metal screws to attach flexible metal duct. These screws should be equally spaced around the duct's circumference. When installing ducts bigger than 12 in. in diameter use five evenly spaced #8 screws. In either case, the screws should be located at least 1Ș2 in. from the end of the duct.
To secure nonmetalic flexible duct to a sleeve or collar, use a draw band. If the duct is larger than 12 in. in diameter, the metal collar needs to have a bead put in it, and the draw band should be located behind that bead.
Insulation and vapor barriers on factory-fabricated duct needs to be fitted over the core connection and then also secured with a draw band.
Tapes and sealants used on connections should be listed for UL 181B, Closure Systems for Use with Flexible Air Ducts and Connectors, a standard out in first edition in 1995.
Proper Support
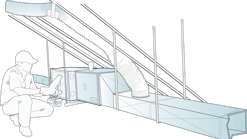
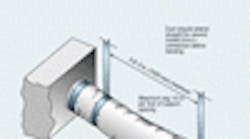
It's best to follow the manufacturer's instructions on how far apart duct supports can be, but in their absence, SMACNA says supports shouldn't be more that 5 ft. apart. The maximum sag the SMACNA standard calls for is 1Ș2 in./ft. of spacing between the supports. You can consider the connection to other duct or to equipment as a support point.
Hanger or saddle material in contact with the flexible duct has to be wide enough so it doesn't reduce the internal diameter of the duct when the supported section rests on the hanger or saddle material.
The part of the hanger touching the duct should never be less than 1 in. wide. You can use narrower hanger material in conjunction with a sheet metal saddle that meets this specification. This saddle must cover one-half the circumference of the outside of the flexible duct and fit neatly around the lower half of the duct.
The standard allows factory installed supports that are integral to the duct, as long as the manufacturer's recommended installation procedures are followed. However you support the duct, make sure the supports are adequately attached to the structure.
To avoid tearing the duct's vapor barrier, don't support the entire weight of the flexible duct on any one hanger during installation. Avoid contacting the flexible duct with sharp edges of the hanger material. You can repair damage to the vapor barrier using an approved tape. If you penetrate the interior of the duct, you should either replace that section, or treat the torn area as a connection.
Any terminal devices you attach the flexible duct to should have their own support.
A Final Word
So you can tell them apart, flexible air ducts have rectangular UL labels on them every 10 ft. Flexible connectors, on the other hand, have round labels every 10 ft. The standard says, ȐUL, NFPA, and most codes make distinctions between these two products in their limits of application. Connectors are more restricted and are currently limited to 14 ft. of installed length. Regulations governing these forms of duct should be checked, especially for floor penetrations, ceiling air plenums, and fire-rated floor-ceiling or roof-ceiling assemblies.
While flexible duct usually comes compressed in various lengths, if you repeatedly flex the metal version, it will probably develop fatigue stress cracks and leak when the system is started.
Finally, on the subject of compression the standard states, "Compressing duct increases first cost and friction losses. The minimum length refers to the practical route between connection points but not to the degree that the material is overstressed or to the degree that all available stretch is removed. SMACNA discourages the practice of providing excess length in case of future building modifications."
Over the last several years, there's been a lot of attention paid in this magazine and elsewhere to proper duct system design, and balancing of residential systems. The first and most important step, however, is to install the system properly, especially the air supply system.
Following SMACNA's and the industry's guidelines is a sure way to accomplish that.


