by Danny Moore
There are many styles, shapes, and sizes of ice machines, and while the actual method of making ice varies from manufacturer to manufacturer, ice machines share many similarities in the way they’re serviced. Understanding the elements common to ice machines makes servicing any manufacturer’s model easier.
Installation: Improperly installing an ice machine is sure to lead to many service problems later. To ensure proper operation, the following installation procedures should be completed:
- Check manufacturer’s specifications
- Check that the unit is level, front to back and side to side
- Check for proper sizing and routing of water and drain lines, and adequate water flow
- Check for adequate electrical power supply according to the nameplate.
- Allow for proper air flow around the equipment and maintain proper ambient conditions
- Always follow manufacturers’ recommended start and check procedures
- Complete the warranty registration procedures
- Go over unit operation and r VALmended maintenance procedures with the customer.
Cuber Types: Cuber ice makers represent approximately 80% of U.S. ice maker sales. There are two types of evaporator systems used in these machines. Horizontal evaporators can be found in such systems as the Kold Draft, the IM style Hoshizaki, and the slab/hot wire grid types such as older out-of-production machines manufactured by Rosstemp, Frigidaire, and Whirlpool. Vertical evaporators include the KM Hoshizaki, the CM Scotsman, and those made by Ice-O-Matic, Manitowoc, Crystal Tips and others. Evaporator materials include tin or nickel-plated copper, or stainless steel.
During the freeze cycle, a pump forces water up and across or onto the evaporator plate. Once the water cools to 32F, cubes form on the freezing surface or in the grid cell.
When the cubes reach full size, a control initiates a harvest, or defrost, cycle. Generally, harvest is accomplished by diverting hot discharge gas to the evaporator and in some cases, using water to assist in heat transfer through the evaporator. Once the ice cubes are removed, the harvest terminates, and the freeze cycle starts again. This cycle continues until the bin is full and a bin control shuts the unit off.
Flakers: Flakers freeze ice and continuously remove it from the evaporator cylinder. A separate harvest cycle is not required. Since it isn’t needed, flakers have a distinct sequence of operation, and different controls than cubers.
There are two basic flaker designs - internal and external auger types. The internal auger design is more predominant in the field.
Flaker ice machines use a low-speed gear motor to turn their augers. Most of these motors are direct-drive or spline-coupled to the auger. Augers shave, crack, or cut ice from the evaporator cylinder or barrel and move it up to the evaporator outlet. Some flakers actually extrude the ice from an extruder that squeezes out excess water to produce a crisper quality of ice.
A flaker evaporator cylinder is made of either stainless steel, a porous material such as brass, or copper that must be plated.
All auger type ice makers have bearings that allow the auger to rotate. Both sleeve and ball bearings are used, depending on the design and the manufacturer’s preference. Bearings should be inspected for excessive wear as recommended by the manufacturer.
Preventive maintenance should also be scheduled according to the manufacturer’s recommendations. Following these directives is imperative on flaker ice machines, since doing so can prevent costly repairs. Preventive maintenance should include a thorough cleaning, sanitizing, and bearing inspection.
Water quality is important to flaker ice production and ice machine component life. For this reason, flaker manufacturers normally recommend water filtration be installed on their products.
Service Problems
There are some basic troubleshooting procedures that apply to both cubers and flakers. You’ll find service problems fall into three categories: water, refrigeration, and electrical systems.
Water system failures: The water system includes an inlet water valve (float type or solenoid valve), water pump (for cubers), a reservoir, and a water distribution system. Some systems have a siphon or water displacement device to remove sediment from the reservoir. They may also include a pump-out or purge period to flush out the water system.
The frequency and type of water-related problems will depend on the local water quality. However, all ice machines will require cleaning at some point. You should use the ice machine cleaner recommended by the manufacturer. Be aware that some ice machine cleaners will adversely affect plated evaporators. Follow the instructions provided with the unit to ensure proper cleaning and sanitizing.
Water treatment should be used in areas where water quality is poor. Filter companies generally provide water quality test kits, which will help you select the proper treatment required for your area. Treatment may range from applying a simple course filter to the addition of poly-phosphate, chlorine, a mild food-grade acid, or a charcoal- charged filter element. Regardless of the treatment, the filter must be properly maintained and sized to provide adequate water flow to the unit.
Refrigeration system failures: The refrigeration system of an ice machine contains basic refrigeration components and a hot gas valve for ice harvest. (Some designs use hot gas with a water assist.) Additional components may be included, depending on the system design and the refrigerant used. You may find line valves used on the liquid line or for liquid bypass, condenser pressure regulator valves, an accumulator or crankcase pressure regulator, and various pressure switches for control or safety.
Basic refrigeration troubleshooting principles apply for refrigeration diagnosis of ice machines.
The most common metering device used in ice machines is the expansion valve (thermal or automatic type). Ice machines generally use low superheat valves around 2F to 4F. Most manufacturers don’t recommended the superheat method of adjustment because of the varying evaporator load during the freeze cycle. Patience is essential for proper adjustment on models with adjustable valves. You need to check the unit pressures, ice fill, and frost pattern to ensure proper adjustment.
Early ice machines used R-12 refrigerant. As the industry required more ice production from smaller units, R-502 became widely used. This started a trend toward faster cycle times. (Note: Most manufacturers design equipment with short cycle times. There …s at least one cuber line designed with longer cycle times and a larger ice drop weight that is intended to extend component life).
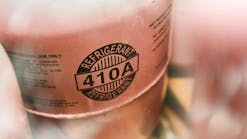
The international concern regarding ozone depletion forced the ice machine industry to seek alternatives to CFCs. Some manufacturers chose to use the old standby HCFC-22 for a while. Most have now moved to HFC-404A as their standard.
Since CFCs are no longer available, it’s necessary to use the appropriate HCFC alternative when servicing older units. Always check with the equipment manufacturer for recommendations before converting an old unit to an alternate refrigerant.
The refrigerant charge in an ice machine is critical for proper operation and should meet manufacturer’s specifications. Remember: New refrigerant blends must be charged in liquid form. To prevent liquid slugging, you must use a flash device. Charging by pressures, frost line, sightglass, or the “SWAG” method may allow the unit to operate. However, most manufacturers recommend weighing or measuring in the refrigerant charge according to nameplate information for the best performance under a wide range of conditions.
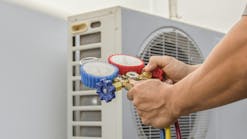
Note that the evaporator and condenser must be thoroughly clean before assuming a refrigerant charge problem or a components failure. Considering the CFC issue, you should only install gauges as the last resort. Always follow the EPA guidelines and recommendations on refrigerant recovery and handling.
Electrical system failures: An ice machine’s electrical system includes the circuits for the compressor, cuber pump motor, fan motors, water valves, auger gear motor (for flakers), line valves for harvest and bypass, control voltage transformer, and low voltage controls.
Basic electrical troubleshooting principles apply when you’re checking these components individually.
You should know and understand the sequence of operation for the particular unit you’re servicing. The
sequence will vary with different styles of equipment. However, all manufacturers will provide the details of their operational sequence.
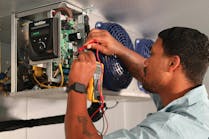
Check unit operation throughout the sequence to pinpoint the electrical problem area. Use a good quality Volt/Ohm or amp meter to diagnose the suspect components.
Successful Troubleshooting
There are five aspects to successful troubleshooting:
- Listen to the customer’s complaint. Many times the symptoms they explain can help you pinpoint the problem area.
- Know and understand the unit sequence of operation. Start the unit to ensure that the sequence of operation is occurring correctly. Check the components for proper operation.
- Rely on your senses: sight, sound, and touch. Visually inspect the unit for trouble. Listen for unusual sounds from the unit. You can also rely on touch to help you diagnose a refrigeration system failure or a hot motor, etc.
- Use the tools of the trade properly to aid you in diagnosing refrigeration and electrical system failures.
- Use a logical approach to troubleshooting and develop your own method of diagnosis.
By using these five basic aspects, you can systematically pinpoint the problem and subsequently put your customer back in the ice business.
Danny Moore is the director of technical support at Hoshizaki America, Inc. He has 26 years of HVACR industry experience, including time as a service technician, and an instructor. He can be reached by calling 800/233-1940.

