On your way to perform a preventive maintenance tune-up on a customer's heat pump? Here are the steps to take. When you first enter the customer's home, write the date and your name on your company's service from (or, better yet, a service agreement form). Write the current thermostat settings down as well, so that you can return the thermostat to its original settings before you leave the job. Then, set the thermostat to put the system in heating or cooling mode as appropriate.
Go to the indoor unit and write the model and serial numbers on the form. Make sure the size(s) and types of the air filter(s) are noted on the service form, and clean or replace the air filter. If the filter is clean, leave the customer a new filter from your truck.
Ask the customer if he or she has any special problems or questions. Do your best to answer any questions and correct any problems they're having. If the customer has problems that aren't covered by the service agreement, write it on your service form and bring it to the attention of the service manager or scheduler. If you fix any problems not covered by the service agreement while you are there, fill out a service invoice. Be sure to give the customer whatever discount they are entitled to.
Patience is a Virtue
Don't start taking readings as soon as you turn on the system, because they will not be accurate. I've used data loggers to record system temperatures and current draw, and found that temperature drop across the coils continues to change for 5 to 15 minutes, and compressor current changes significantly for 5 to 10 minutes, after the system is turned on.
While you're waiting for system conditions to stabilize, you can record the incoming voltage and the indoor and outdoor fan motor currents, as these readings won't change significantly after startup.
Check the crankcase heater (if one is present) for proper operation by measuring its current draw. Clean the main condensate drain on every check-up by vacuuming it from the outside or blowing it out from (never towards) the indoor unit. Add algaecide treatment to the indoor air handler main drain pan during every visit. Failure to clean and treat the condensate drain can cause un-necessary service calls.
Check the Charge
Make sure the air filter is clean before checking refrigerant. Before taking the reading, use a sling psychrometer to take wet bulb and dry bulb temperatures at the return, and mark them on your form. Most systems that use piston or cap tube metering devices have charging charts that require indoor wet bulb and outdoor dry bulb temperatures. Take the outdoor dry bulb temperature by shading the thermometer by the outdoor unit.
After you've adjusted the refrigerant level, wait 10 minutes before taking your final superheat reading. Check all capillary tube units and piston metering device type systems for charge using the suction superheat method. Units with an expansion valve are normally charged by sub-cooling. The required superheat or sub-cooling is normally noted on the nameplate or inside the service panel. If there are no charging instructions included with the unit, use standard charts, which are available from most manufacturers.
After you have verified that the refrigerant charge is correct, measure the compressor motor current and record it on your form. Always check run capacitors. If they're weak, the system may still run, but it will use more power than needed, causing the customer to have higher electric bills than necessary.
Don't Overdo the Oil
Oil the outdoor fan motor during either the heating or cooling season checkup. Over-oiling can ruin the motor, especially if it has rubber mounts. Make sure you use non-detergent motor oil, SAE #20 or #30. Detergent type motor oil can ruin the bearings. It's not as critical to oil the indoor fan motor, as most have sealed bearings. Indoor motors without sealed bearings usually need to be oiled only every 3 to 5 years, as they're not exposed to the weather like outdoor fan motors.
Clean the outdoor coil after checking the superheat. Don't check the superheat while the outdoor coil is wet; it gives erroneous readings. When cleaning the coil, first spray the coil with non-corrosive detergent, and then rinse it with water. I don't recommend using corrosive coil cleaners (including the so called "non acid" cleaners and brighteners), as I've found that, over time, they diminish the heat transfer capabilities of the coil. They also leave a residue on the coil, even when it's rinsed thoroughly with clean water.
Check the condition of the indoor coil while you're adding the algaecide. If the indoor coil is dirty, clean it with evaporator coil cleaner while you're there. Use evaporator coil cleaner to clean the coil; you don't need to rinse it, as the condensate draining off the coil will rinse it. Evaporator coil cleaner is not corrosive.
The Devil is in the Details
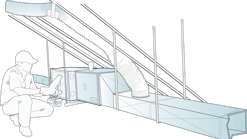
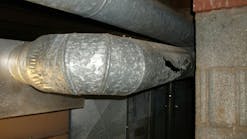
Check the condition of the duct system, where accessible. Check the condition of the indoor unit wiring while adding the algaecide. Check the condition of the outdoor unit wiring also. Note any deficiencies on your service form.
Check the supply and return temperatures near the end of the checkup, after you've checked the refrigerant. At the same time, check the temperature drop across the outdoor unit.
During the heating season checkup, check the supply air temperature with strip heat on as well as with strips off. All readings should be taken in the heating mode for the heating checkup. Mark down both readings. Each kW of strips should draw about 4 amps at 240 volts. When you're checking strip heaters, check the actual size as marked on the nameplate of the unit. If the strip heat size isn't marked on the outside of the unit, open the cabinet and take the rating of the heater itself. Unless there's no nameplate showing the strip heat size, don't try to guess the size of the heater. Write the actual rating down on the checkout sheet.
After checking the strips, note the difference between the supply temperatures with strips and without strips. This is the strip heat temperature rise. Be sure to take the supply air reading out of direct line of sight from the strip heaters, as the radiant heat from the elements can cause errors in your readings. It's best to take at least two supply air readings and average them together. Find the airflow for the system using this formula:
Mark the result on the checkup form. In case you don't already know, BTU/Hr is calculated by multiplying volts X amps X 3.413.
When checking the temperature change of the indoor coil, 14F to 20F is normal in cooling mode, depending on the indoor relative humidity. In heating mode, the temperature rise will vary with the outdoor temperature.
Check heat pumps to be sure all defrost components are operating properly. If the defrost control uses a coil thermostat, you can disconnect the outdoor fan to make the coil get cold faster. This works even if it's 60F out-side, to allow the unit to go into the defrost mode. You can also jump out the defrost thermostat and manually advance the timer or jump the test pins on the defrost circuit board to speed up the electronic timer. You may check refrigerant in the cooling mode for a heating checkup, if it's warm enough outside, but you still need to check the temperature rise across the indoor coil and strips in the heating mode.
Finishing Touches
When you're done with the checkup, have cleaned up, and moved all tools and supplies back to the truck, make one last walk through check to make sure you haven't left anything behind. Then, set the thermostat back to the way it was before you started the checkup.
Make sure all breakers and disconnects are turned back on. Always make sure the Schrader caps are tight when you're done checking the refrigerant charge.
Finally, answer any questions the customer has, and make sure you leave a copy of your instruction sheets, if your company has any. Note any problems or customer concerns on your service agreement form. Then, get ready to receive a positive comment card from a happy customer.
Kevin O'Neill, CM, is the co-owner of O'Neill-Bagwell Cooling & Heating, Myrtle Beach, SC. He has 30 years experience in the HVAC service business, is a 23-year member of RSES, and was a finalist in the 2005 NATE Certified Technician Competition. Kevin can be reached at 843/385-2220, e-mail [email protected]


