Most service technicians can sustain a conversation about evaporator superheat and total superheat, but are far less comfortable delving into the emerging conversation about superheat through the duct system. However, measuring superheat in the duct system is just as important as measuring it through the equipment.
Start With the Basics
By way of background, let’s start with a quick review of the cooling cycle in the most common residential cooling system: direct expansion (DX), using refrigerant and forced air.
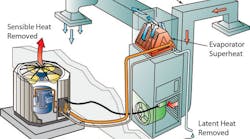
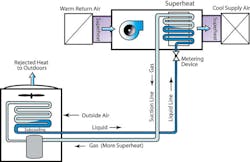
Refrigerant leaves the condensing unit as a liquid and travels through the liquid line to enter the evaporator. The liquid moves through a metering device and its pressure is reduced. Heat from the house is drawn through the return air and added to the refrigerant as its conversion to a gas begins. As heat is removed from the house, the refrigerant in the coil gains heat. It becomes superheated when all liquid refrigerant is turned to a gas.
Cool air now exits the coil and is distributed throughout the house through the supply duct system. Sensible heat is pulled by the compressor back to the condensing unit through the suction line, where it is discharged outside through the condensing unit. Any moisture removed from the evaporator (latent Btus) is discarded down the condensate drain.
Problems begin when operating conditions of the system fall outside of the published design parameters. HVAC systems are dynamic; when one temperature or pressure changes, every other temperature and pressure reacts to that change. HVAC systems are built to change. When operating, everything is constantly changing. There is really no such thing as “steady state” in a heating or cooling system. Keep this in mind when testing and diagnosing every system.
Diagnostics and Manufacturer’s Specifications
When evaluating superheat issues, start by knowing the manufacturer’s specifications. When stating equipment capacity, the operating conditions are always attached to the rated Btus of the equipment.
For example, when three-ton equipment is rated at 33,600 Btu, it is at 95F outdoor and an entering (entering the equipment) air temperature of 63F wet bulb and 75F dry bulb at 400 cfm per ton. (63F wet bulb/75F dry bulb indicates air that is around 50% relative humidity.) When the outdoor temperature changes, the temperature or humidity of the entering indoor increases or decreases, or the system airflow changes, equipment capacity will change as well.
Refrigerant temperature and pressure charts are also invaluable when testing and diagnosing systems because they also express the relationship changes under varying conditions.
Measuring Three Types of Superheat
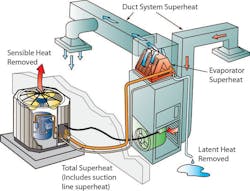
Just as crimes are often solved by “following the money,” performance issues in an air conditioning system can often be solved by “following the heat.” Follow heat as it moves through the system to see if the system is or is not performing as it should. That means understanding and measuring all three types of superheat: evaporator, total, and duct system.
1. Evaporator superheat. To measure evaporator (indoor coil) superheat, first measure the suction line temperature at the evaporator outlet. Next, measure the refrigerant pressure at the suction line of the indoor coil. In order to do this you may have to install a Schrader valve tee into the external equalizer fitting on the suction header of the coil, or externally through a brazed-in fitting. Purge your hoses, connect your gauges, and start the system. Let it run for approximately 10 minutes, and then read the evaporator outlet pressure. Using the appropriate refrigerant pressure chart, convert the pressure reading to saturation temperature.
Evaporator coil superheat may then be calculated by subtracting the saturation temperature from the suction line temperature. Compare the evaporator superheat to the manufacturer’s specifications based on the type of metering device the system uses. Remember, the amount of superheat is based on the volume of refrigerant allowed to enter the metering device and the return air temperature at the time of the test.
2. Total superheat. As the refrigerant exits the evaporator through the suction line and travels to the outdoor condensing unit, it typically picks up additional heat. Ideally the suction line is well-insulated, and the refrigerant’s trip through a hot attic (in summer months) is quite short. However, this is not always the case, and total superheat must be measured and calculated to ensure the longevity of the compressor.
The procedure and test instruments required for measuring and calculating total superheat are the same for measuring and calculating evaporator superheat. The only change is the location where the measurements are taken.
Measure the suction line temperature and suction pressure at the suction side service valve. Ensure the temperature probe is insulated from any external influences. Convert the gauge pressure to saturation temperature and subtract this temperature from the suction line temperature. This is the total superheat.
Compare the total superheat to manufacturer’s specifications and ensure it is within range for the conditions at which you’re testing.
If the readings are unsatisfactory, the system may have an equipment airflow issue or a problem with the refrigerant charge.
3. Duct system superheat. While technically not normal refrigerant side superheat, one of the most overlooked performance issues missed by service techs is the superheat of the duct system. The duct system plays a critical role in the performance of the system and deserves equal testing and diagnostics.
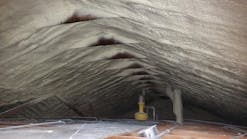
Generally we assume that equipment capacity and system capacity are the same thing. Rarely is this the case in the field. The equipment may be performing perfectly, but as the air passes through the duct system it may be superheated or subcooled before or after it leaves the equipment. If a technician is too focused on the equipment and the refrigeration cycle and fails to look beyond the box, the real source of a poorly performing system can be missed.
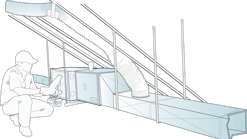
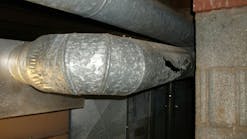
To measure duct system superheat, start on the return side. Measure and record the air temperature entering the return grille. Then measure and record the air temperature entering the equipment. Subtract these two temperatures. If the temperature loss or gain through the duct system is more than 5% of the temperature change through the equipment, it warrants a repair such as eliminating or reducing duct leakage or adding additional duct insulation.
On the supply side, measure the air temperature leaving the equipment and the air temperature at the farthest register. Subtract the two temperatures and if the temperature change through the duct system exceeds more than 5% of the equipment temperature change, duct tightening or added insulation can be recommended.
Finally, don’t forget to always check a system’s static pressure. On the pressure side of the duct system, measure operating total external static pressure by using a low-pressure manometer and a static pressure tip. Measure the pressure entering and exiting the air-moving equipment and add the two pressures together. Compare this pressure to the published maximum total external static pressure listed on the equipment nameplate. If the pressure exceeds the manufacturer’s rated pressure, modify the duct system, clean the indoor coil, or replace the air filter with a less restrictive filter.
Rob “Doc” Falke, David Richardson, and Scott Johnson serve the industry through National Comfort Institute an HVAC based training company and membership organization. If you’re an HVAC contractor or technician interested in receiving a free procedure to measure duct superheat or total external static pressure, email [email protected] or call any of the authors at 800/633-7058. Go to NCI’s website at nationalcomfortinstitute.com for free information, articles and downloads.


