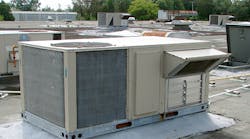
A recent evaluation of several hundred commercial rooftop systems around the country exposed a hidden flaw that deteriorates system efficiency up to 40% ‑ Rooftop equipment curbs. Let’s take a look at how you can quickly diagnose and solve curb problems you may encounter in the field.
What's a Curb?
A curb is a pre-fabricated pedestal or stand that sits below a rooftop package unit. Normally, the supply and return airflow enters and exits the equipment through the curb.
Top Three Curb Issues
From the test data provided by our study of the performance of these systems, the top three efficiency killers include:
- Decreased airflow due to restrictive plenums
- Misalignment of the equipment and the curb
- Missing gaskets.
Let’s drill down deeper and consider the defects, inspection, and testing that help identify problems and solutions that you can prescribe for your customers.
Restrictive Plenums
When curbs are either custom fabricated in the shop, or pre-stocked by a manufacturer for equipment replacement, the biggest problem is that the curb is too short.
In an attempt to keep curbs short to save on materials and reduce structural reinforcement, curbs are often not tall enough to provide for a good transition. Short curbs have insufficient room for a proper transition between the inlet and discharge of the new equipment and the existing supply and return plenum.
Short transitions result in a high restriction to airflow and high static pressure drops -- both detrimental to the performance of any system.
Inspection – Restrictions can be visually found by opening the return access panel and inspecting the transition down to the return plenum. If the transition appears restricted, measure the pressure drop as air moves through the transition under normal operating conditions.
Testing – Replace the return access panel and assure the economizer (if the system has one) is in minimum position. Drill a static pressure test hole before and after the transition and measure the static pressure at both locations.
Subtract the lowest pressure from the highest pressure to find the pressure drop over the return and supply transitions within the curb. Ideally, the pressure drop shouldn’t exceed 10% of the fan-rated capacity of the equipment for either of the transitions.
If the pressure drop exceeds 10% of fan-rated capacity, you may be able to add additional return duct capacity to compensate and increase system airflow.
Solution – Curbs may resemble a tomb where the transitions to the plenums are encapsulated for eternity and little can be done, except to replace the curb with one that is taller and less restrictive.
If you’re lucky, some transitions can be rebuilt in place to be less restrictive to airflow.
Misaligned Curb and Equipment
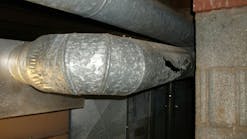
Due to the cost of cranes or helicopters on commercial projects, the placement of new equipment on curbs is often completed quickly. This results in misaligned connections between the curb and equipment, resulting in air leakage and added restrictions.
Warm or cold outside air can be pulled into the system, further deteriorating its operating efficiency. In addition, the return air and pressure release dampers of an economizer may fail to operate properly.
Hot and cold air can short cycle through the curb and cause the coil to freeze, compressors to sludge, and heat exchangers to crack. This defect is often missed by maintenance techs or service personnel.
Inspection – Inspect and feel for air leakage around the outside of the equipment first. Remember supply leakage is 15 times easier to feel than the suction of a return air leak, so spend some extra time on the return side. The use of a smoke puffer makes air movement visible.
Roof bubbling may also indicate leakage from the ducts into the curb and out under the roofing membrane.
Testing – Plot the airflow of the fan using the manufacturer’s fan curve, the measured static pressure, and fan RPM. Then measure all return grilles and add the CFM together. Subtract the fan plotted CFM from the total return grille airflows. The difference is either air loss in the curb or return duct leakage.
Repeat the testing on the supply side. Subtract the total supply register airflow from the fan plotted CFM to find evidence of more curb misalignment.
Solution - Equipment doesn’t need to be lifted very high to be realigned on the curb. Four floor jacks and two sticks of heavy metal angle iron may be used to lift the equipment enough to shift it squarely back onto the curb. Be careful not to trash the gasket material as the equipment is moved.
Gasket missing – A thick gasket material is normally installed between the curb and the rooftop equipment to form an airtight seal between the curb and the equipment. Care must be taken not to tear the gasket or damage it during installation or airflow may leak in and out of the curb.
Inspection – Use the smoke puffer to check for leaks around the edge of the equipment. If accessible, you may also inspect around the connection to the equipment inlet and discharge by removing the access droops.
Testing – Drill a small access hole at the top of the curb (below the flashing) so water won’t enter the curb preserving the integrity of the roofing membrane. Then measure the pressure in the cavity of the curb.
More Testing -- Using the same test hole, you can measure the air temperature within the cavity of the curb. Normally that temperature will only be 3 to 4 degrees different than outside when the equipment has been running. Warmer or colder temperatures may indicate leakage of conditioned air from the supply duct.
Ideally there should be no pressure differential outside of the transitions. However, if there is a positive pressure, this is evidence of supply leakage. A negative pressure is evidence of return leakage.
Solution – Either lift the unit and replace the gasket or use a good quality outdoor foam or silicon sealant to make the repair.
Ideally a roof curb should have little or no impact on the performance of the system. Should testing and inspection uncover the problems described above, be sure to share this information with your customers. The payback for curb repairs is usually very short, because the impact on operating efficiency from defective curbs is often substantial.
Rob “Doc” Falke serves the industry as president of National Comfort Institute an HVAC-based training company and membership organization. If you're an HVAC contractor or technician interested in a free Curb Temperature Diagnostic Procedure, contact Doc at [email protected] or call him at 800-633-7058. Go to NCI’s website at nationalcomfortinstitute.com for free information, articles, and downloads.

